The only things missing are the front bumper, valence (with turn signals) and stone-guard.
This photo shows the current state of assembly.

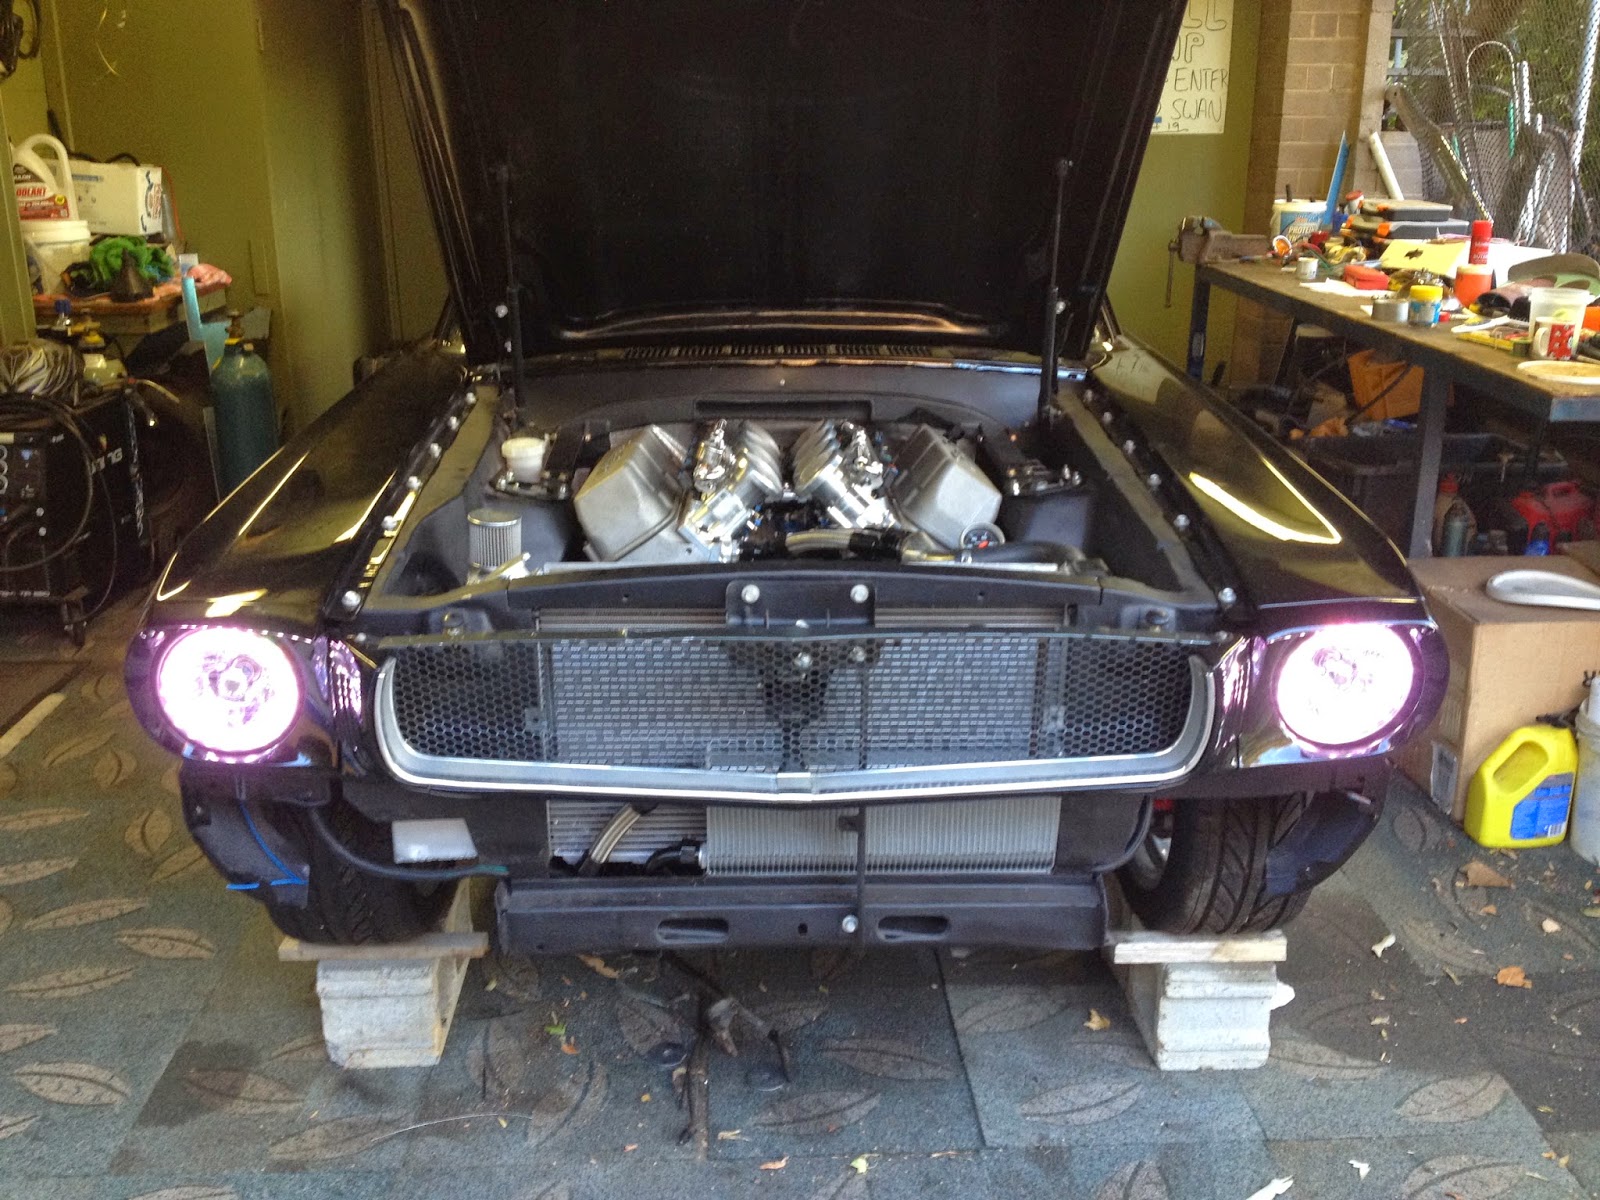
What is obvious in the above photo is the wider radiator opening and external oil cooler.
But now with the panels painted, refitting them was always going to be the real acid-test in regards to how well the final "fit" would end up. I worked hard in the preparation stage to have constant (neat) panel gaps. But while you do what you can in this area (via mocks ups and adjustments) before paint on the bare body shell, you just never really know how it will turn out with the engine/driveline installed and the suspension loaded up - and this engine is no lightweight! The body and chassis naturally does flex, splay, move around, etc..... Thankfully, by working forwards from the doors, I could still adjust things to a nice neat finish - but it was definitely different from when the car was just a shell.
Here are some photos of the engine bay.


You can see that I've gone with contrasting (Cadmium plated) fender bolts for the front guards and hood latch mechanism. I've also gone with a '65 grille as I prefer that style grille more than the '66 horizontal grille. The headlights are newer H4 halogen units and I've gone the extra mile and used "Halo" headlamps from Redline with the white LED's in the ring around the lamp itself. These LED's within the headlamps will be my "parking lights" rather than using the amber running lights located in the front valence. The amber units in the valence will be dedicated as turn signals. All my lights apart from the low and high-beam headlights are LED's (this includes tail-lights, dash, interior).
Keen eyes may notice that I've modified my front shock-tower supports inside the engine bay so that they can unbolt at the top of the shock-tower load-plate, and pivot upwards from where they mount on the firewall (to fold up against the underside of the hood and be "out of the way"). Space is at a premium around this motor and this adjustment lets me get to rocker-covers, spark-plugs, coils and leads with some sort of dignity.
Now for the front valence. Have a look at this photo of what I have to work with...

With my customised radiator support having such a wide opening, a standard 65/66 Shelby valance/scoop just doesn't work. It would bolt up and fit ok, but with such a narrow inlet, it would block half the airflow I am trying to achieve. So - I'm in the process of combining the standard valence and stone-guard into a single unit, and then I'll graft a custom air scoop into it. I need to be careful here though as changing the front facia of a car can ruin the look very easily. All I can say is that this custom scoop opening needs to be subtle - so it wont poke out forward like a race car, wont be "super low", etc. It will be the width I need though and all metal. Stay tuned.
Other tricks?
I've routed my front wiring from inside the cabin on the passenger side (for Australia remember) and out through the firewall, but up inside the front right fender. As it runs forward in under the front wheel-arches, up as high as possible, all wiring is inside a length of 1" o.d. PVC electrical conduit. This custom "loom" carries wiring for the front turn signals, running lights, high/low beam, auxiliary oil pump power, thermatic fan control, and even a length of CAT-5 (for future IP based camera, security, and functionality options that I have in mind). All this wiring is completely hidden when looking into the engine bay of course to give it a nice neat finish. About the only thing missing within the engine bay now is a final thermo-fan setup. But I've made sure I have plenty of room for it and that can wait for when the car sees some traffic.
The next post will probably be about wiring the dash, installing the instrument cluster, and maybe the beginning of the interior trim fit. Now some additional photos.......